Folio Master Wireframes
Folio Class List
The 'Folio' link from the Masters view screen takes one to the folios(members)search page.

Any member can be searched by member name or membership number by selecting specific class.
If the search does not give any results, you can search again or create new folio(member).

If correct membership number or member name is entered while search, only that specific member will be displayed.
If partial name is entered while search, all member names related to the serach condition will be displayed.
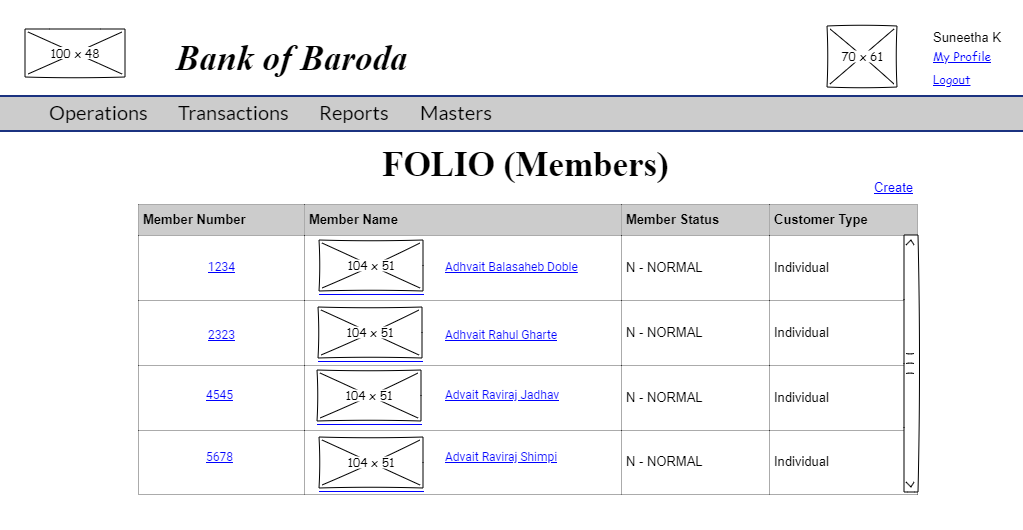
A member can be viewed by clicking member number or member photo or member name to view the further details.
Folio View
User story reference: U2803
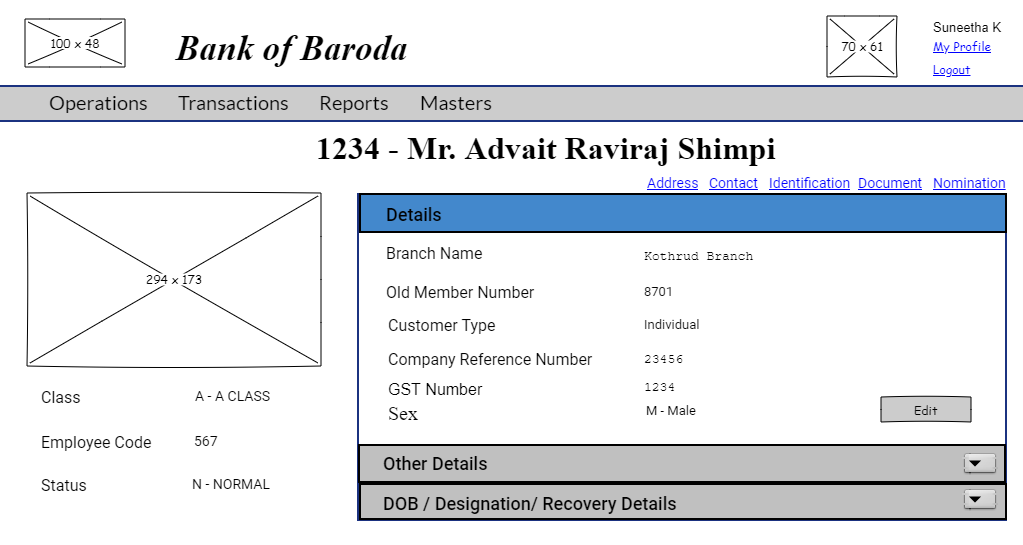
Click a member, and you see the member's page. We have used an accordion, whose first section will be open by default.
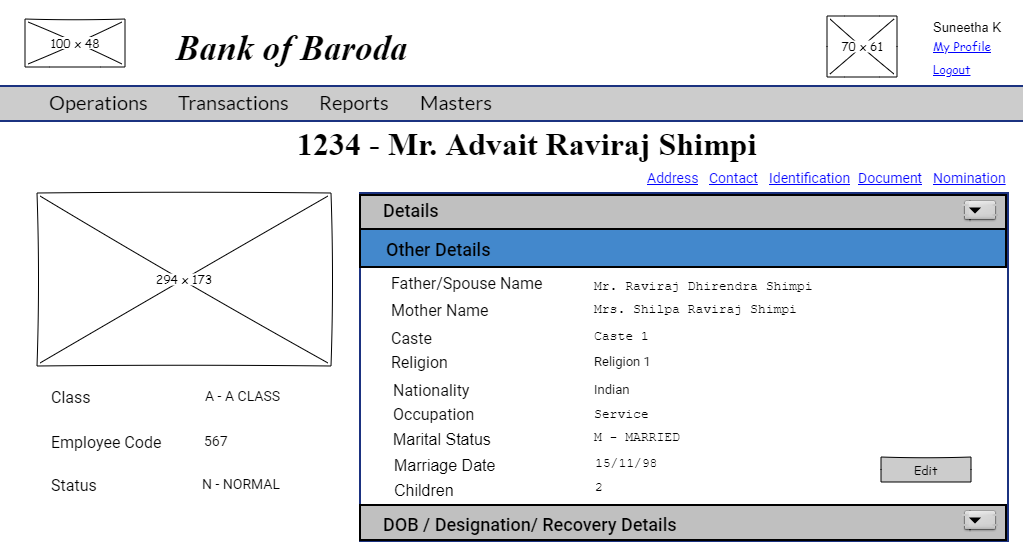
You may then open other sections by clicking on them. Here is the second tab to view member's other details.
And here is the third one to view the dob,designation and recovery details.
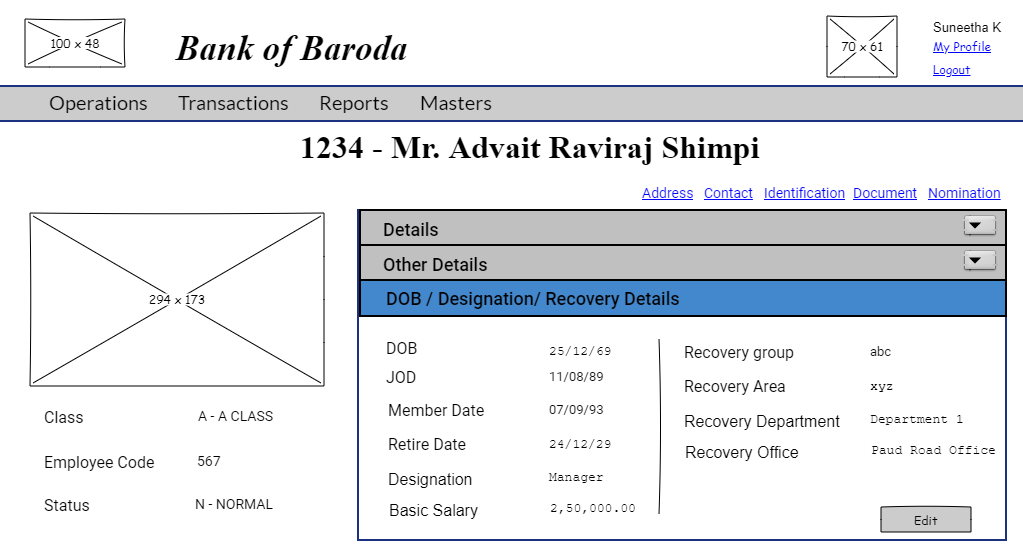
Note : 1)In the view page for Class C members, the second(Other Details) and the third(DOB / Designation/ Recovery Details)accordians are not applicable and hence should not be seen.
Note : 2)For lass C members, in first accordian of view page - employee code, old member number, photo, company reference number, GST number to be disabled.
Folio Edit
User story reference: U2802
Note that there is an edit button in front of each section in the view page. By clicking that, you will be able to edit that section.
Here is the UI to edit the member details.
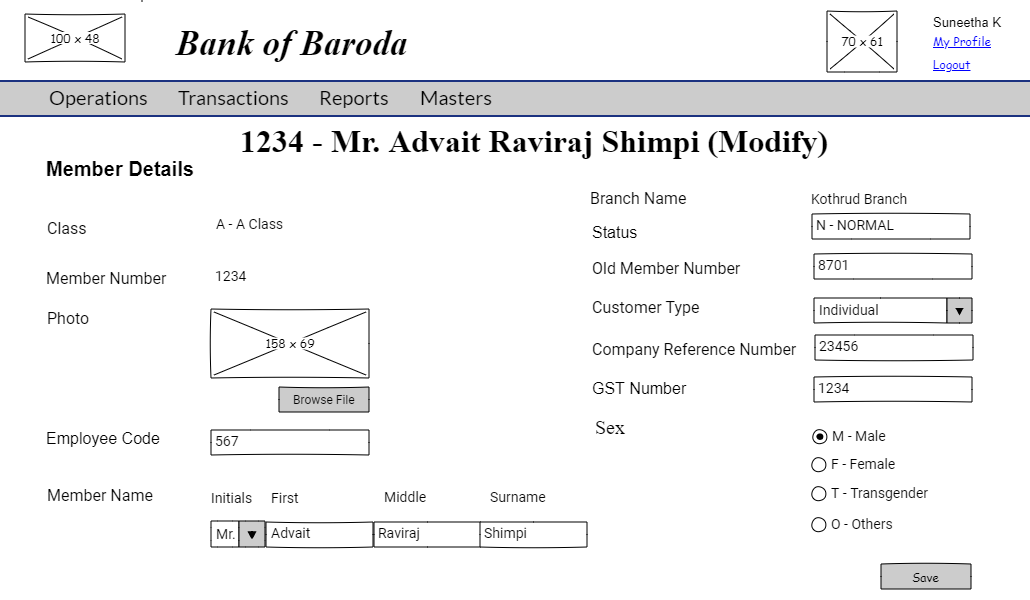
Here is the UI to edit the member other details.

And here is the UI to edit dob,designation and recovery details.

By clicking the "Save" button, the folio details are modified. The modified folio details goes through approval process.
Note : For Class C members since the member photo, the second(Other Details) and the third(DOB / Designation/ Recovery Details)accordians are not applicable respective UI for edit are not required.
Folio Create
User story reference: U2801
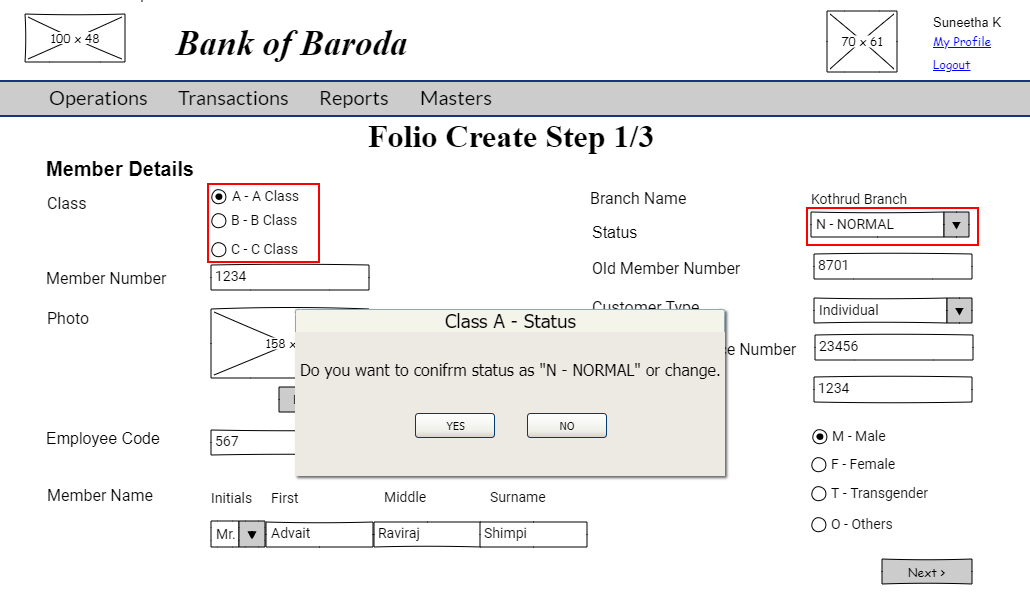
Note that there is a create link on the folio master page.By clicking that, you are taken to folio create step1 page. Here is the UI to enter new member details.

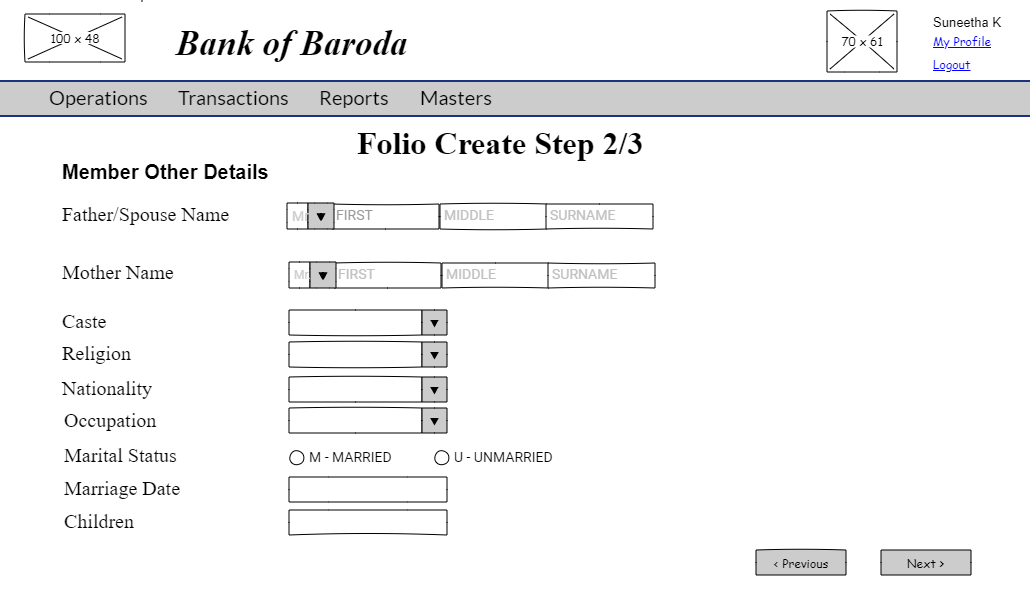
By clicking on "Next" button on folio create step1 page, you are taken to folio create step2 page. You will be able to enter member other details. Here is the UI to enter member other details.
By clicking on "Next" button on folio create step2 page, you are taken to folio create step3 page. You will be able to enter dob,designation and recovery details. Here is the UI to enter dob,designation and recovery details.

Note : 1)While moving out of "DOB" field after entering the data, "Retire Date" field has to be populated. Retire Date is calculated with respect to DOB taking account of bank retirement age.
Note : 2)For Class A members, by default the status in first accordian should be "N - NORMAL". Hence if Class A is selected for "Class" field, the status field should be populated as "N - NORMAL". On click of "Next" button, a confirmation dialogue box need to confirm the status details. Please refer to the screen below. On click of "YES" status is "N - NORMAL" and should move to step 2 of folio creation. On click of "NO", stay on step 1 of folio creation and allow to make change in status value.
Note : 3)For Class C members since the member photo, the second(Other Details) and the third(DOB / Designation/ Recovery Details)accordians are not applicable respective UI for create(step 2 and step3) are not required. The "save" button to be provided on step 1 page with change in heading accordingly.
Note : 4)For Class C members, in step 1 create, employee code, old member number, photo, company reference number, GST number to be disabled.
Note : 5)For all classes on click of "Save" button, the folio number or member number is temporary alloted number in the format "DD/MM/005" (here "005" is a random number allocated.For each date the random number starts from "1" and continues). In this example its considered as a 3 digit random number. Incase, on a specific date, largest 3 digit number "999" has reached, system should be able to continue with 4 digit number increment or 5 digit number increment as the case may be.
By clicking the "Save" button ,you are directed to identification create page.
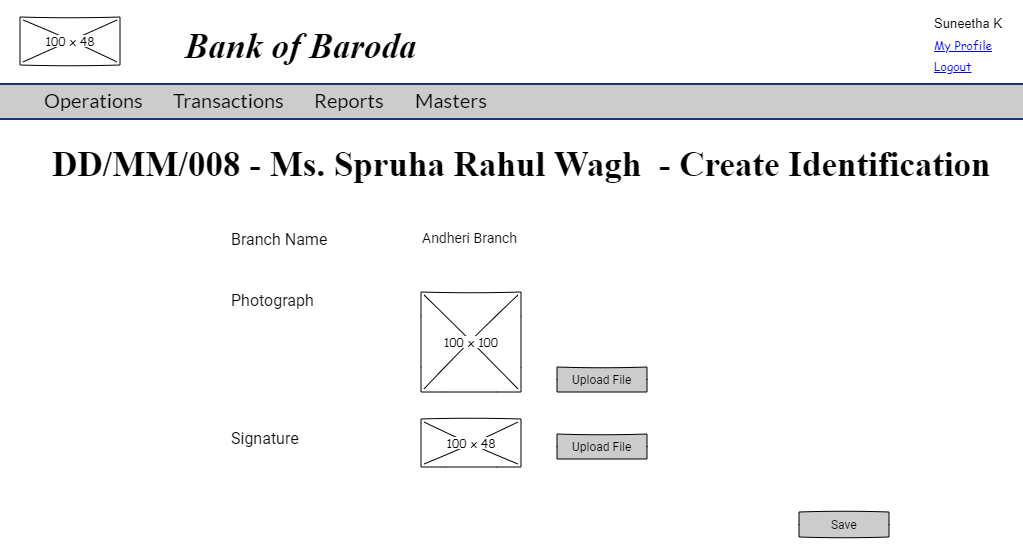
In identification create page, the same member photo of folio create page to be uploaded by default. The photo can be reuploaded in identification create page if necessary.
NOTE : The indentification create page ensures that photo and signature are compulsorily entered.
If identification is created and sent for approval, then auto posting process to be completed and data saved in temporary files.
Note : For Class C members, identification process not required.
The process contiues by providing a confirmation box asking if you wish to add address of the member now.

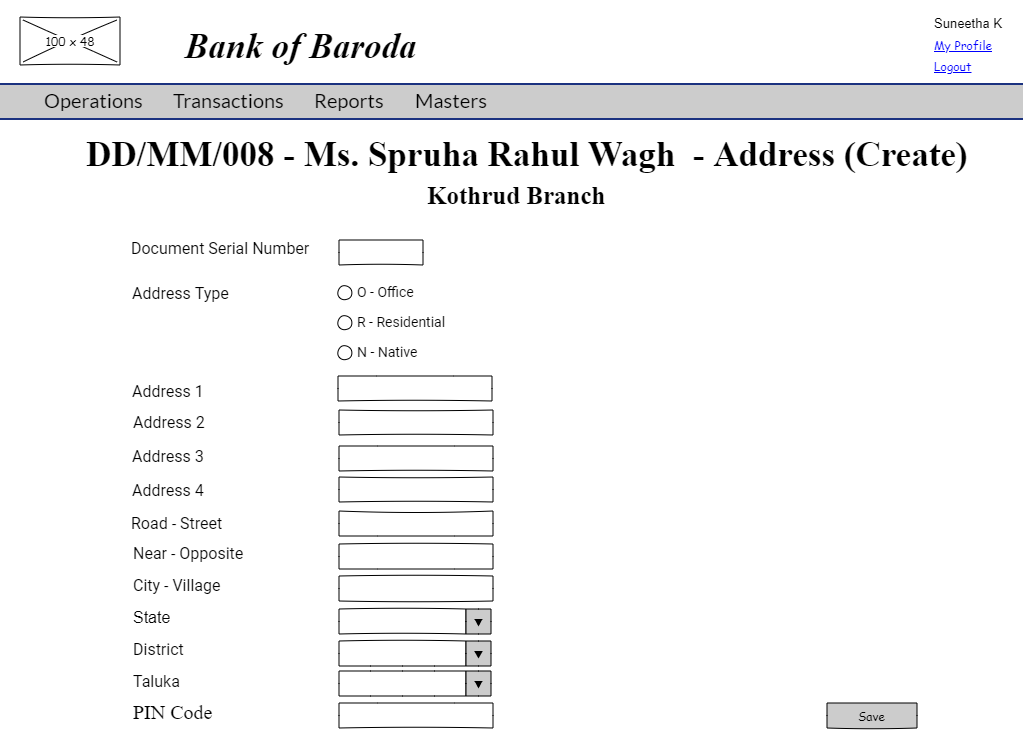
By clicking "YES" button, you are directed to address creation page.
If the, "YES" button was clicked unintentionally and entered into Address create page, then use skip button to return to the previous stage.
After first address is entered, ask "any more addresses to be added". On click of "YES" button again blank address create page is provided. Loop continues till last address is added.
NOTE : The address create page ensures that either Address1 or Address2 is not empty ,then PIN Code is compulsorily entered.

NOTE : This is same as Folio Address Create page of folioaddressmst with temporary folio number.
After completion of address creation (on the last address created and "NO" clicked on address creation loop), you receive a confirmation box asking if you wish to enter document details now.
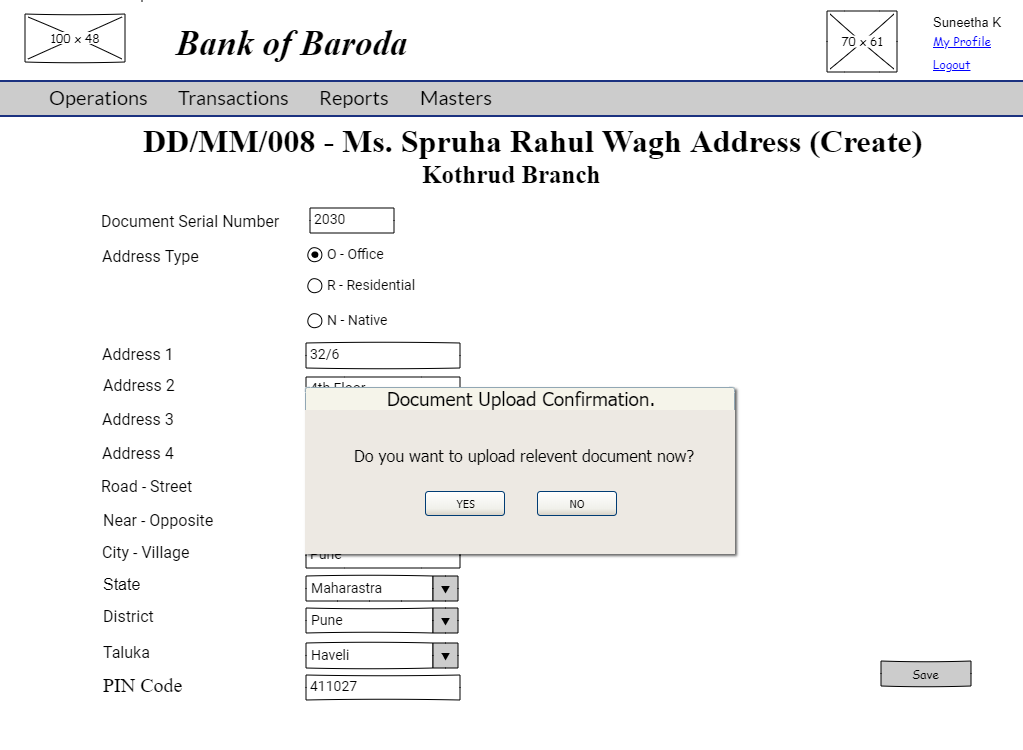
By clicking "NO" button on address creation confirmation box, you receive another confirmation box asking if your wish to enter document details now.
By clicking on "YES" button of document creation confirmtion box, you are directed to document create page.

After first document is entered, ask "any more documents to be added". On click of "YES" button again blank document create page is provided. Loop continues till last document is added.
NOTE : The document create page ensures that document number and document date are compulsorily entered.

NOTE : This is same as Document Create page of DOCUMENTMST with temporary folio number.
After document creation process, the new folio(member) created will go through the approval process with identification and address being created.
By clicking on "NO" button, the new folio(member)created will go through the approval process with identification, address being created and without document being created.
By clicking on "NO" button, during address creation, the new folio(member)and its identification created will go through the approval process.
By clicking on "NO" button on address and document creation, folio(member)and its identification created will go through the approval process.
Please refer to flow chart for the same. 
If identification create process is not completed, then further process to be stopped.
NOTE :
1. If folio created has identification create details completed, then only folio create will go through approval process and auto posting process completed.
2. If folio, identification and folio address are created, then folio, identification details and folio address will go for approval process and auto posting process completed.
3. If folio, identification details, folio address and document are created, then folio, identification & folio address will go for approval process, document created and auto posting process completed.
4. Please follow the below mentioned auto posting process :
**IF accountcreatetable IS NOT EMPTY THEN
 CREATE_ACCOUNTS
 CTR=0
 While(rows >= CTR)
IF query is not return for BANKID and GLCODE THEN
    insert  data in lastglaccount
endif
 IF query is return for BANKID and GLCODE THEN
      if glcode - > autogen is yes then
        ADD 1 TO ACC AND UPDATE lastGLAccount (and store it in a  temp variable)
     else
      acc is same as foliono
  endif
endif
 CTR=CTR+1
 end while
 ELSE
 DONT CREATE_ACCOUNTS
 IF createtransaction IS NOT EMPTY THEN
 CREATE TRANSACTION FOR GLCODE,ACCNO AND AMOUNT
 CTR=0
While(rows >= CTR  and TYPE='C')
   query BranchCode, GLcode and folio number  from accountmst and return data acc
    transaction passing
date day open date
Bankcode
parentBranchcode
transactionBranchcode
trnno (if trnno is unique for all branches, then trndate table should be used else lasttrn table should be used)
setno   (if setno is unique for all branches, then trndate table should be used else lasttrn table should be used)
foliono (fetched from variable)
bookcode        CR
dc              C
trantype        TR
glcode          from  accountmst
schemeid        (blank)
accno        accountmst
amount          from transactioncreate
trind           'S'
docno           empty
narration       "New Member "
narration1      empty
narration2      empty
mnarnarration    empty
mnarnarration1   empty
mnarnarration2   empty
cheqno           empty
docno            empty
clrdt            empty
tokenno          empty
recorddate      current date
recordtime      current time
editdate        empty
edittime         empty
clerk           usercode
acct            usercode
cashier         blank
manager     blank
createuser       usercode (variable-current user loggedin)
authoriseuser   blank
edituser        blank
 CTR=CTR+1
 end while
 While(rows >= CTR  and TYPE='R')
   query BranchCode, GLcode and folio number  from accountmst and return data acc
INSERT DATA IN recoformfee TABLE
date         day open date
foliono      folio number
amount    from create transaction
acc          from accountmst
actype      create transaction
recodate   empty
   CTR=CTR+1
 end while
ELSE
DONT CREATE TRANSACTIONS**
5. If identification create process is rejected, then folio is not created and rest of the approval queue to be cancelled.
6. The folio, identification and folio address approvals will go as a single set.
Folio Change Approval
User story reference: U2804
The approval task list will be visibe only to the user with responsibility to authorise a loan scheme detail change. By clicking that you are taken to the list of tasks pending for approval.
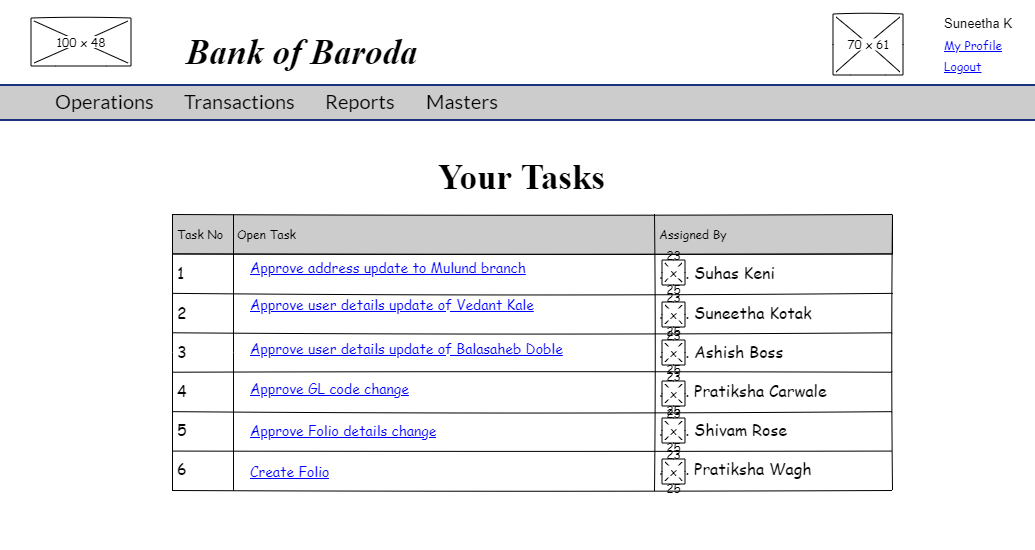
When clicked on a particular task, you will be directed to approve folio page.

You review the folio change details and click on "Approve" or " Reject" button as required.
If "Approve" button is clicked, the folio change will be saved with an information message and you are redicrected to approval task list page.

If "Reject" button is clicked, the folio change will not be saved with an information message and you are redirected to approval task list page.

Please refer to edit approve screen validations.
Please refer to approval workflow validations.
Folio Create Approval
User story reference: U2804
When clicked on a particular task, you are directed to approve create folio page. Here is the UI.

After reviewing the new member details, you will click on next button to view new member other details.
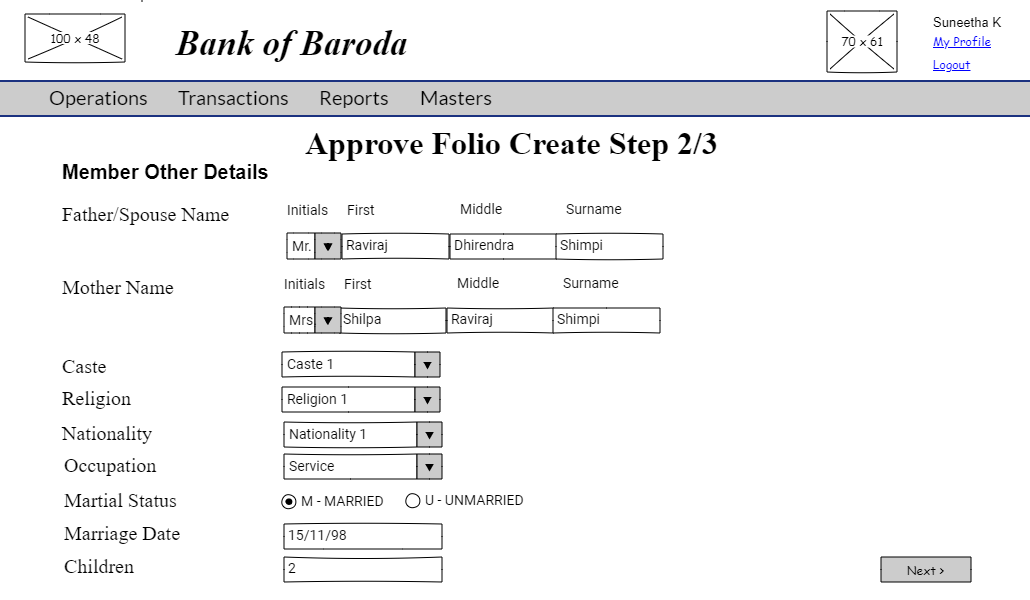
After reviewing the new member other details, you will click on next button to view new member dob, designation, recover details.

By clicking "NEXT" button on "Approve Folio Create Step 3/3" page, the approval work flow takes you to identification approval screen (Please follow the IDENTIFICATIONMST approval screen ). The temporary folio number alloted shoud be considered.
By clicking on the "Approve" button on the identification approval screen, new folio is created and note displayed with the new actual folio number created using the below mentioned calculation.
NOTE : The new folio number has to be created using the following calulation :
If the authoriser, approves, then the number will be fetched from "lastnumber" field of (parameter - 4) table classlastno. "1" is added to the fetched number (new number = lastnumber + 1) and the new number should be saved as "lastnumber" in (parameter - 4) table classlastno. This new number will be assigned as member number or folio number. This new number has to be added to "FOLIONO" field of FOLIOMST table and every where the "FOLIONO" field is available.
NOTE : Insert new folio details in FOLIOMST and insert new identification details of this folio in IDENTIFICATIONMST.
Complete auto posting process .(Follow the process mentioned for same in folio create section).
If approval for address is in the queue, the same goes through address approval. (Please follow the FOLIOADDRESSMST approval screen ). If approved, insert new address details of this folio in FOLIOADDRESSMST.
Insert new document details of this folio in insert new identification details of this folio in DOCUMENTMST.
By clicking on "Reject" button on the identification approval screen, folio is not created and rest of approvals in the folio approval set queue to be removed.
Please refer to create approve screen validations.
Please refer to approval workflow validations.
Please refer to folio master validation validations.